
Discover creative ways to transform vintage glass bottles and ceramic jars into personalized works of art. Learn how...
Latest posts
-
 Painting Glass & Ceramic Objects: Creative Ideas for Vintage Bottles and JarsRead more
 -
 DIY Halloween Decorations: Transform Everyday Items with Cadence PaintRead more
Unlock your creativity this Halloween with a hands‑on guide to upcycling jars, lids and candles using water‑based...
-
 Transform Your Home: Creative Ways to Turn Old Furniture into ArtRead more
Give your outdated furniture a second life with inspiring DIY painting ideas. Discover how Hybrid Multisurface...
-
 DIY Wedding Candle Decorations: Personal Touches That ShineRead more
Elevate your wedding with hand-painted candle décor. From monograms to floral stencils, discover romantic, timeless...
Blog categories
Search in blog
Archived posts

DIY Wedding Candle Decorations: Personal Touches That Shine
DIY Wedding Candle Decorations: Personal Touches That Shine
Weddings are remembered through small, thoughtful details—how the light fell across the aisle, the way tables seemed to glow at dusk, the quiet warmth that made guests feel close. Few décor elements deliver that feeling more reliably than candles. When you paint and personalize them yourself, candles stop being generic accessories and become keepsakes with a story. This guide shows you how to design, paint, and style wedding candles that look effortless, photograph beautifully, and stay consistent from ceremony to reception.
We’ll cover color symbolism, design directions, step-by-step painting techniques, centerpiece styling, seasonal concepts, troubleshooting, budgets, and a practical wedding timeline. Whenever you’re ready to source paints that actually adhere to wax and other slippery surfaces, browse the Candle Paint Category. Water-based formulas that clean with soap and water, comply with CE & EN 71, dry quickly, and don’t require varnish will make your process far easier than improvising with standard craft paints.
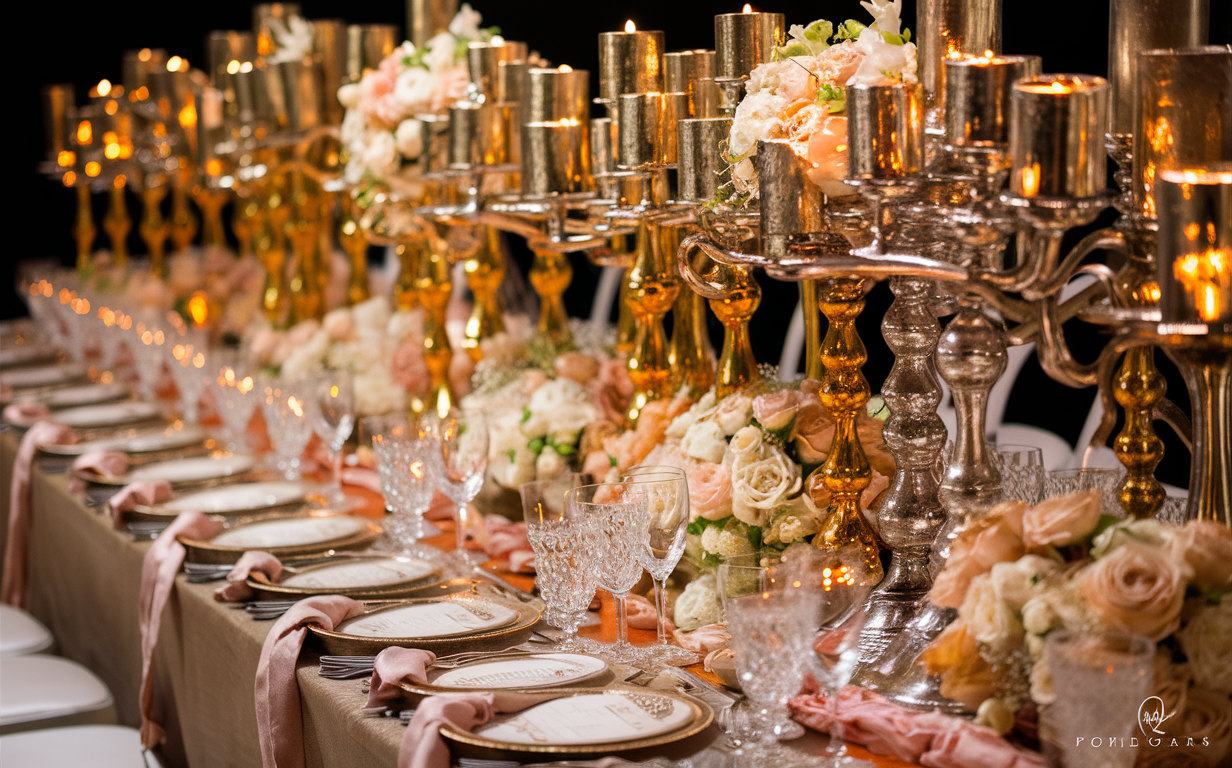 Soft glow, clean lines, and coordinated accents—your candle plan can unify ceremony and reception.
Why DIY Wedding Candles Work So Well
- Personal meaning: Monograms, dates, vows, or motifs connected to your story.
- Theme control: Adapt to rustic, coastal, minimalist, or glamorous concepts without redoing the entire palette.
- Cost efficiency: Customize basic candles at scale while keeping the look cohesive.
- Photogenic glow: Painted metallic highlights catch the lens without overpowering the composition.
- Take-home value: Guests love favors that feel made for them.
Materials That Respect Wax (and Your Schedule)
Pick paints designed for wax and slick surfaces, with a creamy texture and high coverage so thin coats look even. A quality candle paint lets you apply a second coat after natural drying (typically 3–6 hours, depending on temperature and humidity) and avoids tackiness or peeling. You won’t need varnish for protection. For a nuanced romantic palette, experiment with these shades:
- Rich Gold Candle Paint – classic, warm metallic accents.
- Red Candle Paint – bold floral details and romantic linework.
- Petrolium Candle Paint – modern blue-green for coastal or contemporary schemes.
- Antrachite (Anthracite) Candle Paint – sleek contrast and graphic depth.
Color Symbolism for Wedding Candles
Color doesn’t just look a certain way; it behaves emotionally in a space. Use these associations to calibrate your mood:
- Gold: Timeless elegance, gratitude, prosperity. Ideal for accenting unity candles or cake-table glow.
- Red: Devotion, energy, romance. Great as a flourish on otherwise soft palettes.
- Petrolium (deep blue-green): Calm, stability, refined modernity—especially gorgeous near greenery or water.
- Anthracite: Architectural, contemporary, grounding. Use it to balance abundant florals or pastels.
Seven Design Directions (with Styling Notes)
- Monogrammed Unity Trio: Paint initials and your date in gold on a tall pillar with two supporting tapers. Outline with a fine brush; fill with metallics for a raised, luminous edge.
- Botanical Linework: Sketch slender stems, leaves, and tiny buds in red or gold. Keep line weight consistent for a letterpress-like look.
- Lace & Stencil Panels: Use a lace stencil for crisp repeat patterns. Apply paint sparingly with a sponge to prevent bleeding.
- Ombré Columns: Blend petrolium upward into soft white. Work in two thin coats and keep gradients vertical for height.
- Place-Card Votives: Add guests’ initials to mini votives; tie a handwritten tag to the base with silk ribbon.
- Seasonal Icons: Snowflakes, olive sprigs, shells, or wheat—a subtle nod that supports your date without feeling kitschy.
- Constellation Motifs: Micro-dots and short dashes map your zodiac constellations. Looks magical at twilight receptions.
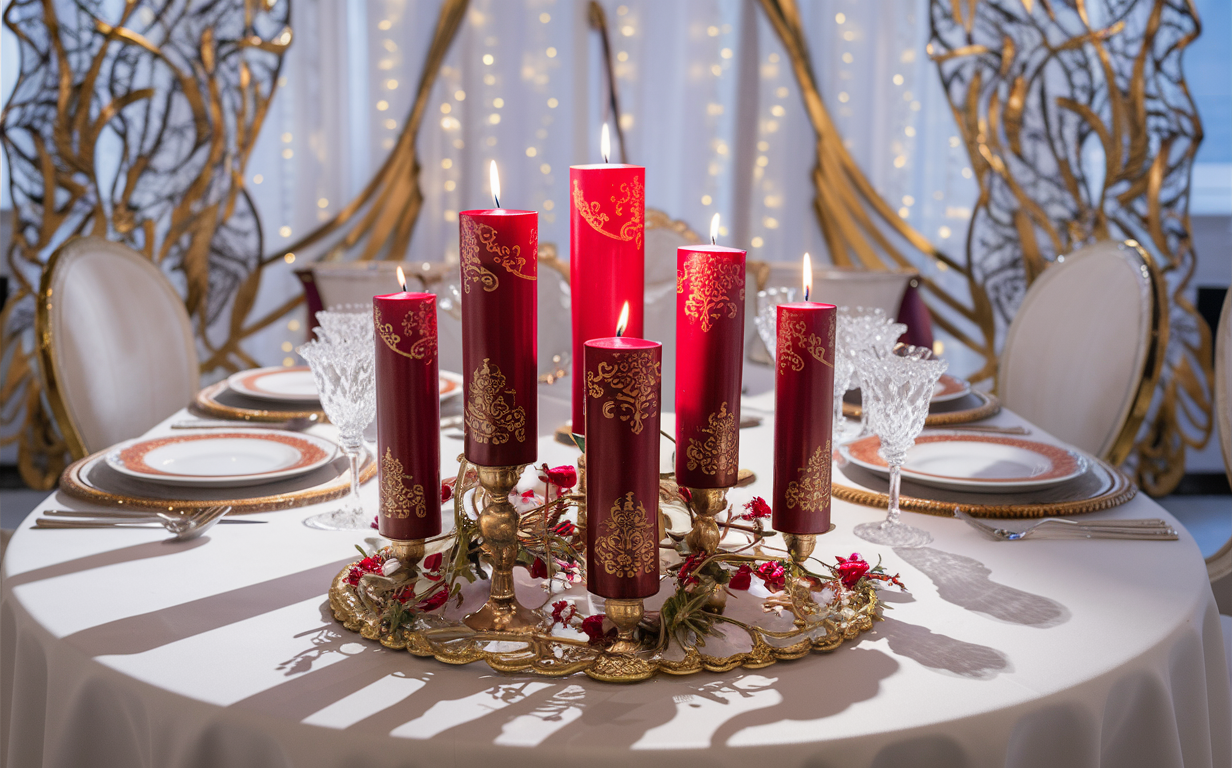 Metallic monograms read clearly in photos and feel heirloom-worthy in person.
Step-by-Step: Painting Candles for Weddings
1) Prep
- Wipe candles with a lint-free cloth. Surfaces must be dust-free and dry for best adhesion.
- Plan your layout: sketch on tracing paper to test sizes against candle height.
2) Base Layer
- Apply a thin, even first coat. Avoid heavy loading; thin coats cure cleaner.
- Let dry naturally for 3–6 hours. Avoid heat guns; natural drying yields a smoother finish.
3) Details
- Use a fine round brush for linework; a sponge dauber for stencils and soft textures.
- Metallics like Rich Gold create high-impact highlights with minimal effort.
4) Second Coat & Finish
- Apply the second coat only if coverage needs it; again, dry naturally.
- No varnish necessary—candle paints cure to a durable, non-tacky finish.
Stenciling Without Bleed
- Secure the stencil with low-tack tape around the curve; work in narrow segments.
- Load the sponge lightly, offload on scrap, then tap vertically—never brush sideways.
- Peel the stencil while slightly damp for a sharper edge.
Tablescape Templates (Copy & Adapt)
Elegant Minimal
- Table: crisp linen, low greenery, glass cylinders with ivory pillars.
- Candles: anthracite linework on ivory; one small gold motif per trio.
Garden Romantic
- Table: soft runners, loose seasonal florals.
- Candles: petrolium ombré columns with fine gold stems; scattered votives with initials.
Modern Coastal
- Table: sand-colored linen, rope accents, pale ceramics.
- Candles: ivory pillars with minimal shell silhouettes in gold; blue-green linework.
Seasonal Concepts
Spring
White pillars with tiny budding branches in red linework; a few gold dots as pollen.
Summer
Petrolium ombré plus thin gold stripes—plays well with citrus and airy fabrics.
Autumn
Anthracite leaves traced over ivory; pair with amber glass and textured linens.
Winter
Snowflake stencils in mixed scales, finished with micro-spatter for sparkle.
Common Mistakes & Quick Fixes
- Smudging: You rushed the dry time. Spot-clean with a damp cotton swab; repaint after full dry.
- Stencil bleed: Too much paint. Use less, tap vertically, and remove while damp.
- Uneven lines: Rotate the candle under your brush rather than moving your wrist around it.
- Peeling: Non-compatible paint. Use dedicated candle paint designed for wax.
Quantities, Budget & Scaling
Plan candles by function: aisle markers, altar focus, tables, lounge areas, bar, cake. As a baseline for 120 guests:
- Aisle: 12–20 pillars in cylinders (reuse at reception if staff can relocate them).
- Tables: 3–5 mixed heights per table (round) or clusters every 60–80 cm (long).
- Feature points: 6–10 for the cake and welcome area combined.
Paint usage stays low with thin coats. Metallics go far—reserve them for accents. Build a sample table to validate counts before committing.
Safety & Practicality
- Use heat-safe glass or sturdy holders; keep flames clear of foliage and fabrics.
- Consider LED inserts where open flame is restricted; painted exteriors still photograph beautifully.
- Never leave candles unattended; assign a coordinator to supervise flame rules.
A Realistic Wedding Timeline
- 8–10 weeks out: Approve palette and motifs; order paints and sample candles. Browse the Candle Paint Category.
- 6 weeks: Paint 3–4 style samples (e.g., Rich Gold linework + Petrolium ombré).
- 4 weeks: Scale to half the total count; refine techniques. Dry naturally between coats (3–6 hours).
- 2 weeks: Complete remaining candles; add ribbons/tags.
- Event week: Pack by zone (aisle/tables/cake) with placement maps.
- Day-of: Place early; light close to guest arrival.
Light, Meaning, and Memory
Your candles don’t have to shout to be unforgettable. A subtle metallic edge, a single botanical line, a calm gradient—these gestures are enough to make a table glow with intention. Use paints formulated for wax and you’ll spend your energy on design, not on fighting the surface.
Ready to sketch your palette? Explore the full Candle Paint Category and test a few hero shades like Rich Gold, Red, Petrolium, or Antrachite. Start with one table prototype; when it feels right, scale with confidence.
A gentle nudge: If you want a second set of eyes on your palette or stencil plan, share a snapshot of your test candles—we’re happy to help you refine before you commit.
Posted in:
DIY Projects
Related posts
-
Transform Your Home: Creative Ways to Turn Old Furniture into Art
Give your outdated furniture a second life with inspiring DIY painting ideas. Discover how Hybrid Multisurface...Read more
-
DIY Halloween Decorations: Transform Everyday Items with Cadence Paint
Unlock your creativity this Halloween with a hands‑on guide to upcycling jars, lids and candles using water‑based...Read more
-
Painting Glass & Ceramic Objects: Creative Ideas for Vintage Bottles and Jars
Discover creative ways to transform vintage glass bottles and ceramic jars into personalized works of art. Learn how...Read more
Leave a comment